

Lattice Make a Fancy Pie
Lattice Make a Fancy Pie
It's not as hard as it looks.

Last week we talked about how to make a homemade piecrust (and that piecrust is spelled as one word), and this week we’re going to take that new knowledge, fancy it up a bit, and put it on top of an apple pie. You can make a lattice work piecrust for any pie you want to, and it’s easy as, well, pie.
When you are using a piecrust recipe, whether mine or someone else’s, pay attention to whether the recipe is for one piecrust or two. Most two-piecrust recipes will say as much in the title, and a good way to tell is whether it calls for 1 1/4 cups of flour or somewhere around 2 1/2 cups. If you are using a regular size pie plate, you will need two piecrusts for this pie, so adjust your recipe accordingly.
I am irrationally exuberant about my Emile Henry pie plate. It was a treat yo’self purchase for me, and I love to bake with it. I’d post a picture of it, but it has the last remnants of the pie you’ll see below, so it’s a bit of mess. A delicious mess, but a mess no less. It is, however, somewhat larger than a standard pie plate, so to make sure I have enough pastry for a decorative topping, I make three piecrust recipes, and halve the third between the bottom crust and the decorative top. I have a good bit of pastry left over, but I’ll show what to do with that in the last picture.
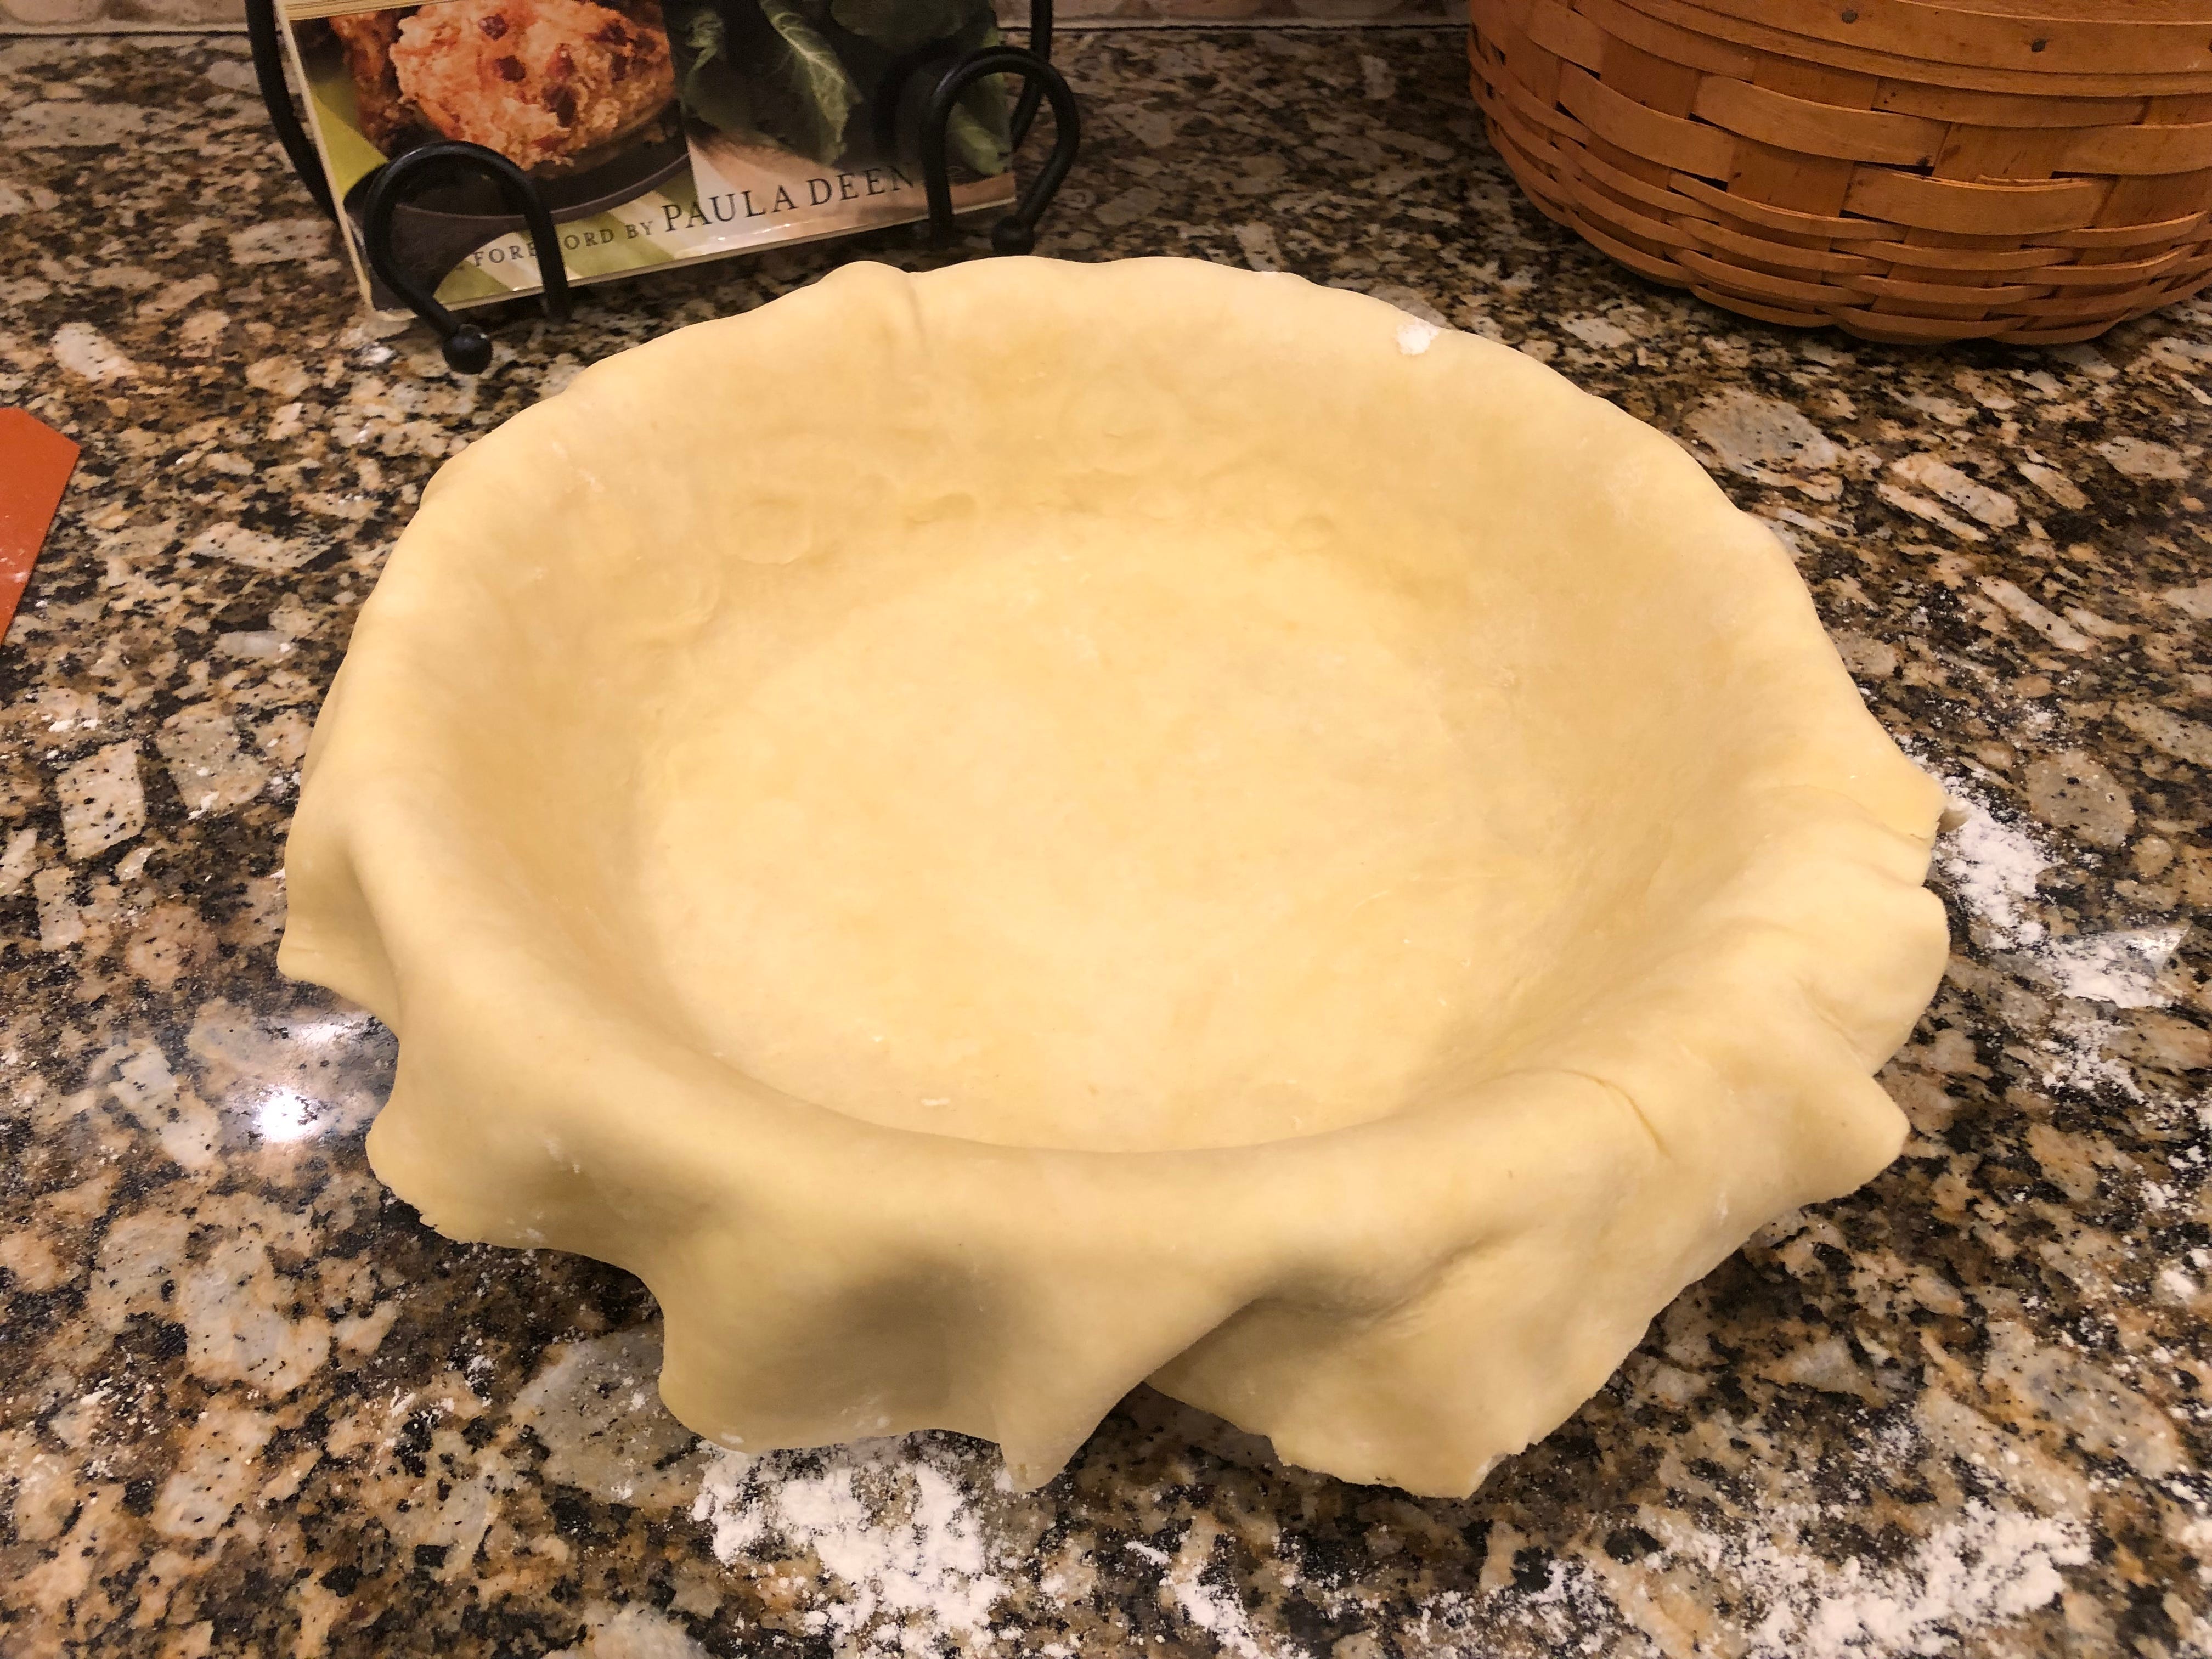
To build the perfect apple pie—my recipe is below—start out by rolling out your bottom piecrust. You’re welcome to use your own recipe or one of mine from last week, or you can even use the ready made piecrusts from the refrigerator section at the grocery store. No judgement here. Carefully ease the bottom crust into your pie plate. You don’t want to stretch the dough, so pick up the sides and push it into the bottom of your plate. Trim the excess with scissors—you have kitchen scissors, right—about an inch from the edge of the plate.
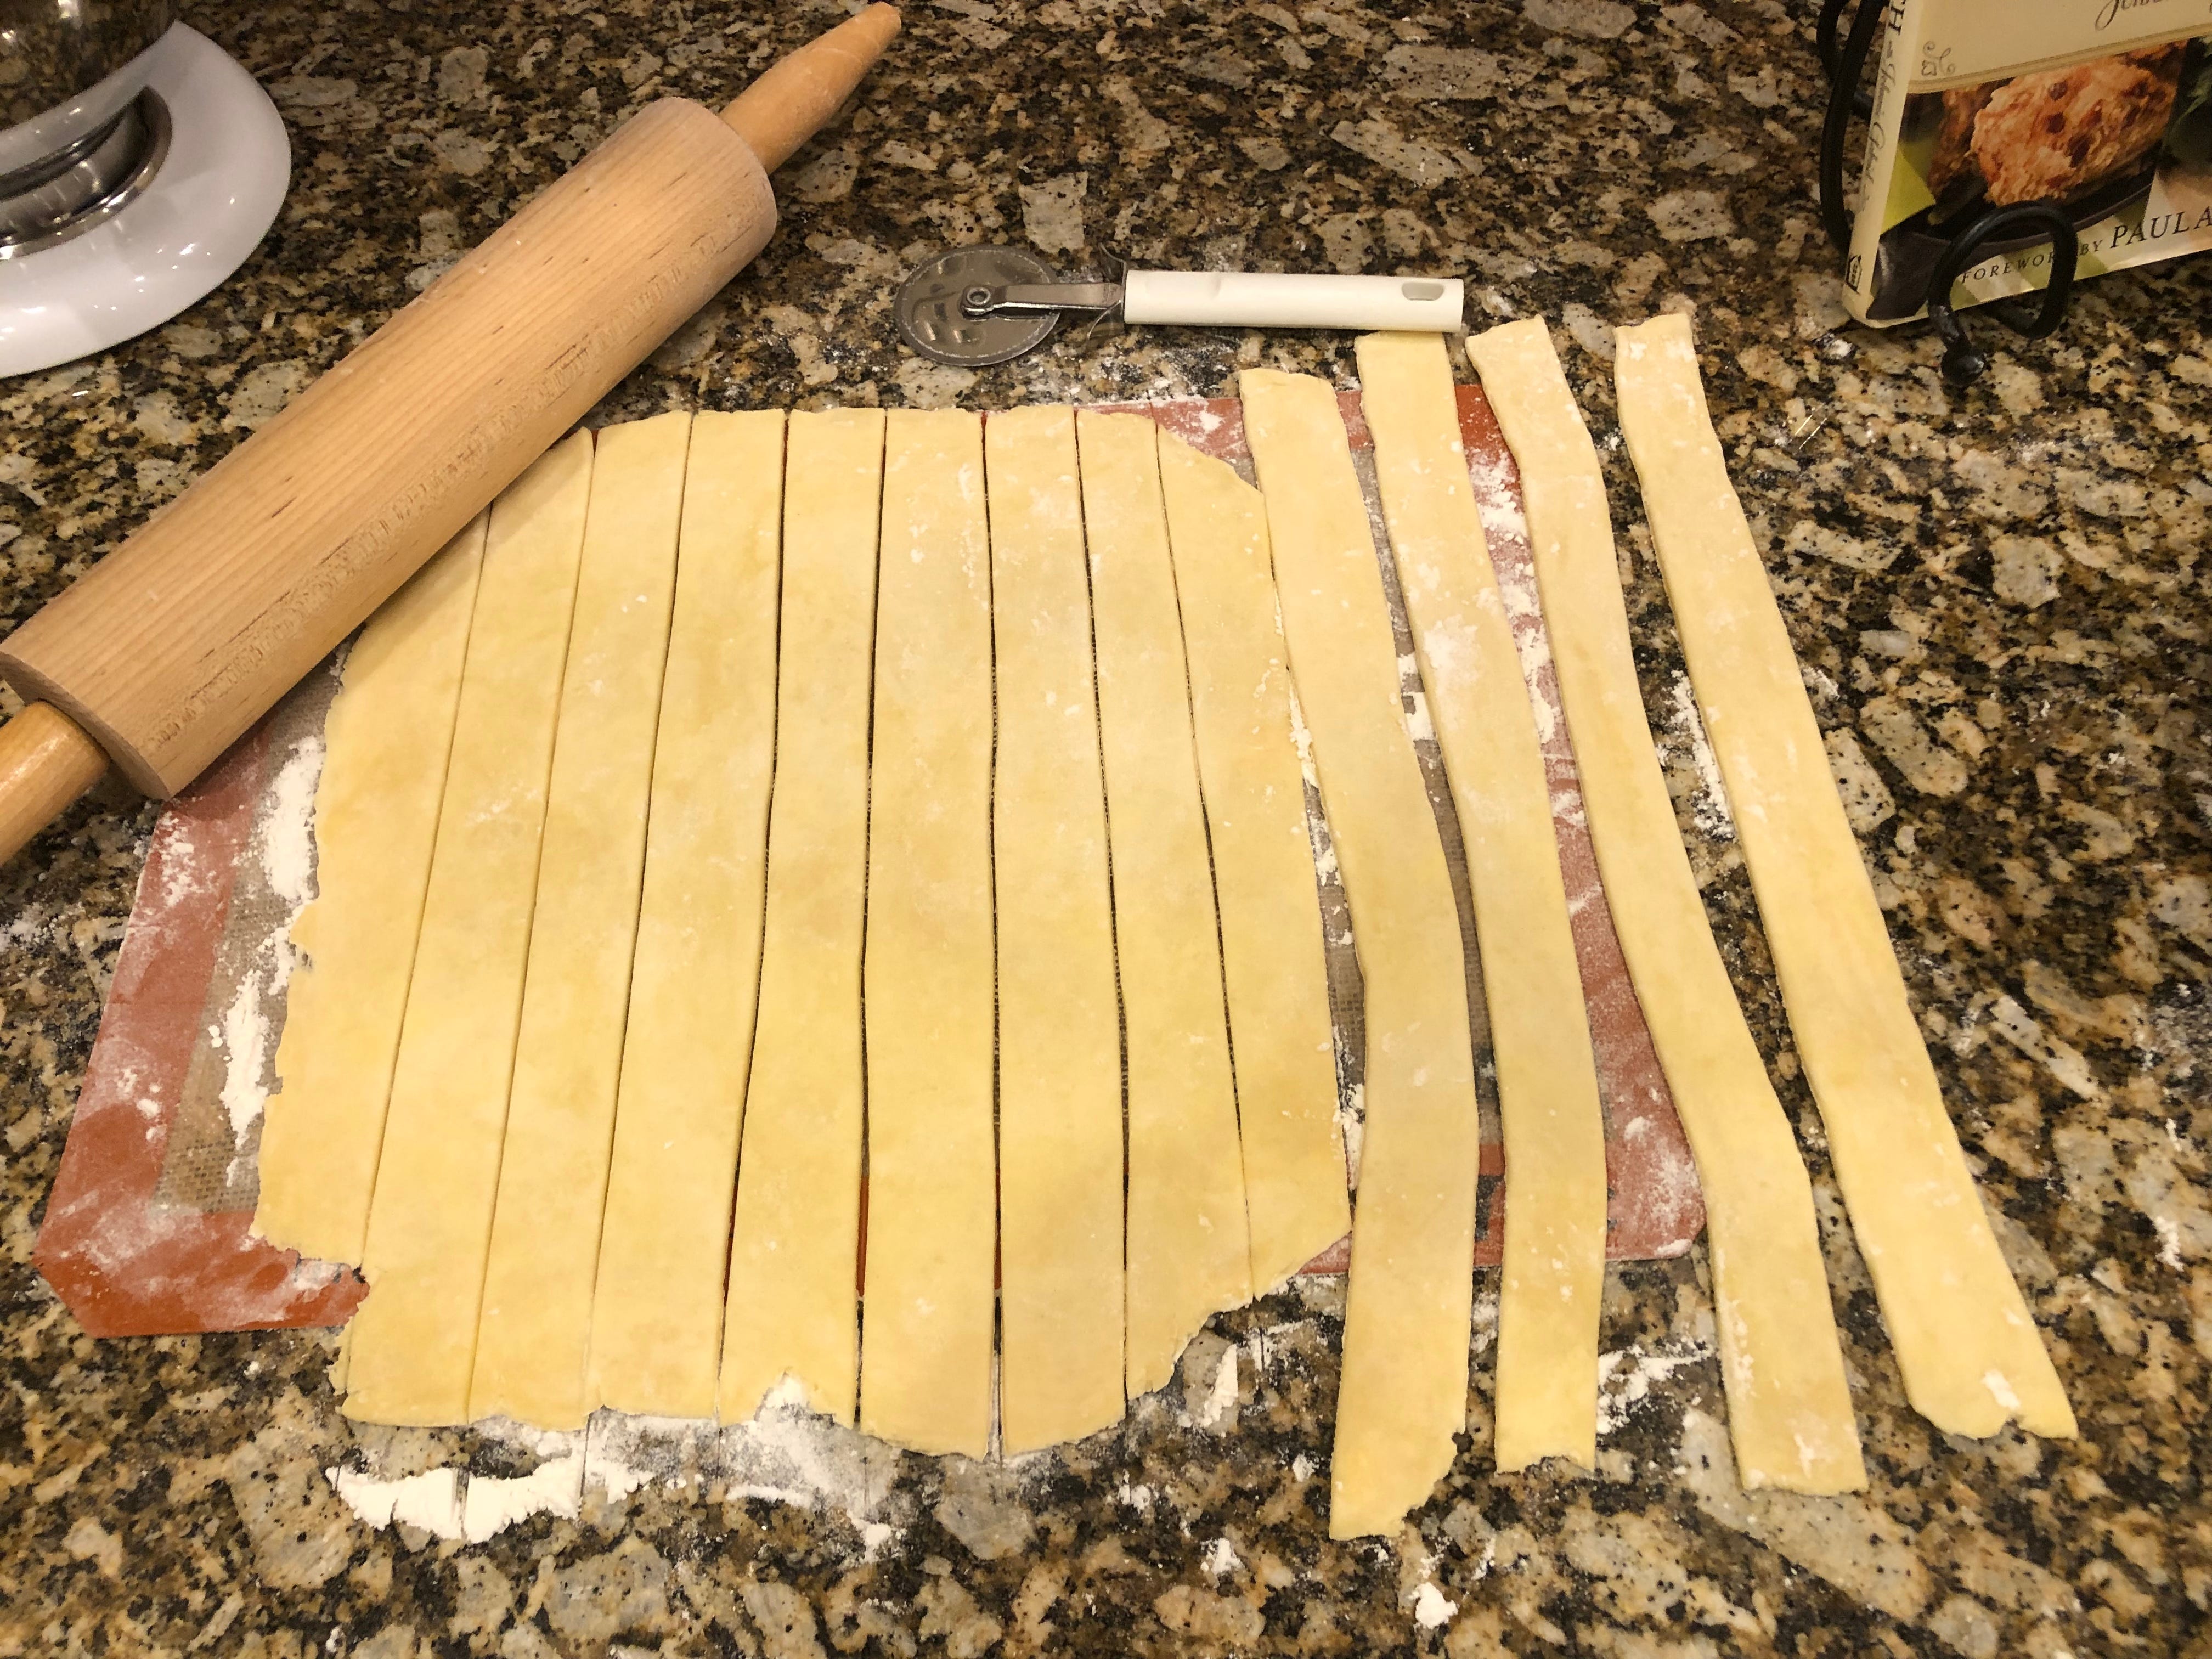
Once your bottom crust is settled, roll out the top crust and cut into strips. I use a pizza cutter and cut the strips about an inch or an inch and a quarter wide. If you want more pieces to “weave” into your lattice crust you can cut them thinner if you want. I freehand mine too, but I’ve heard of more exacting folks using a straight edge. You do you.
Fill the bottom crust with your pie filling and arrange the pastry strips on top for the “warp” on your lattice top loom.
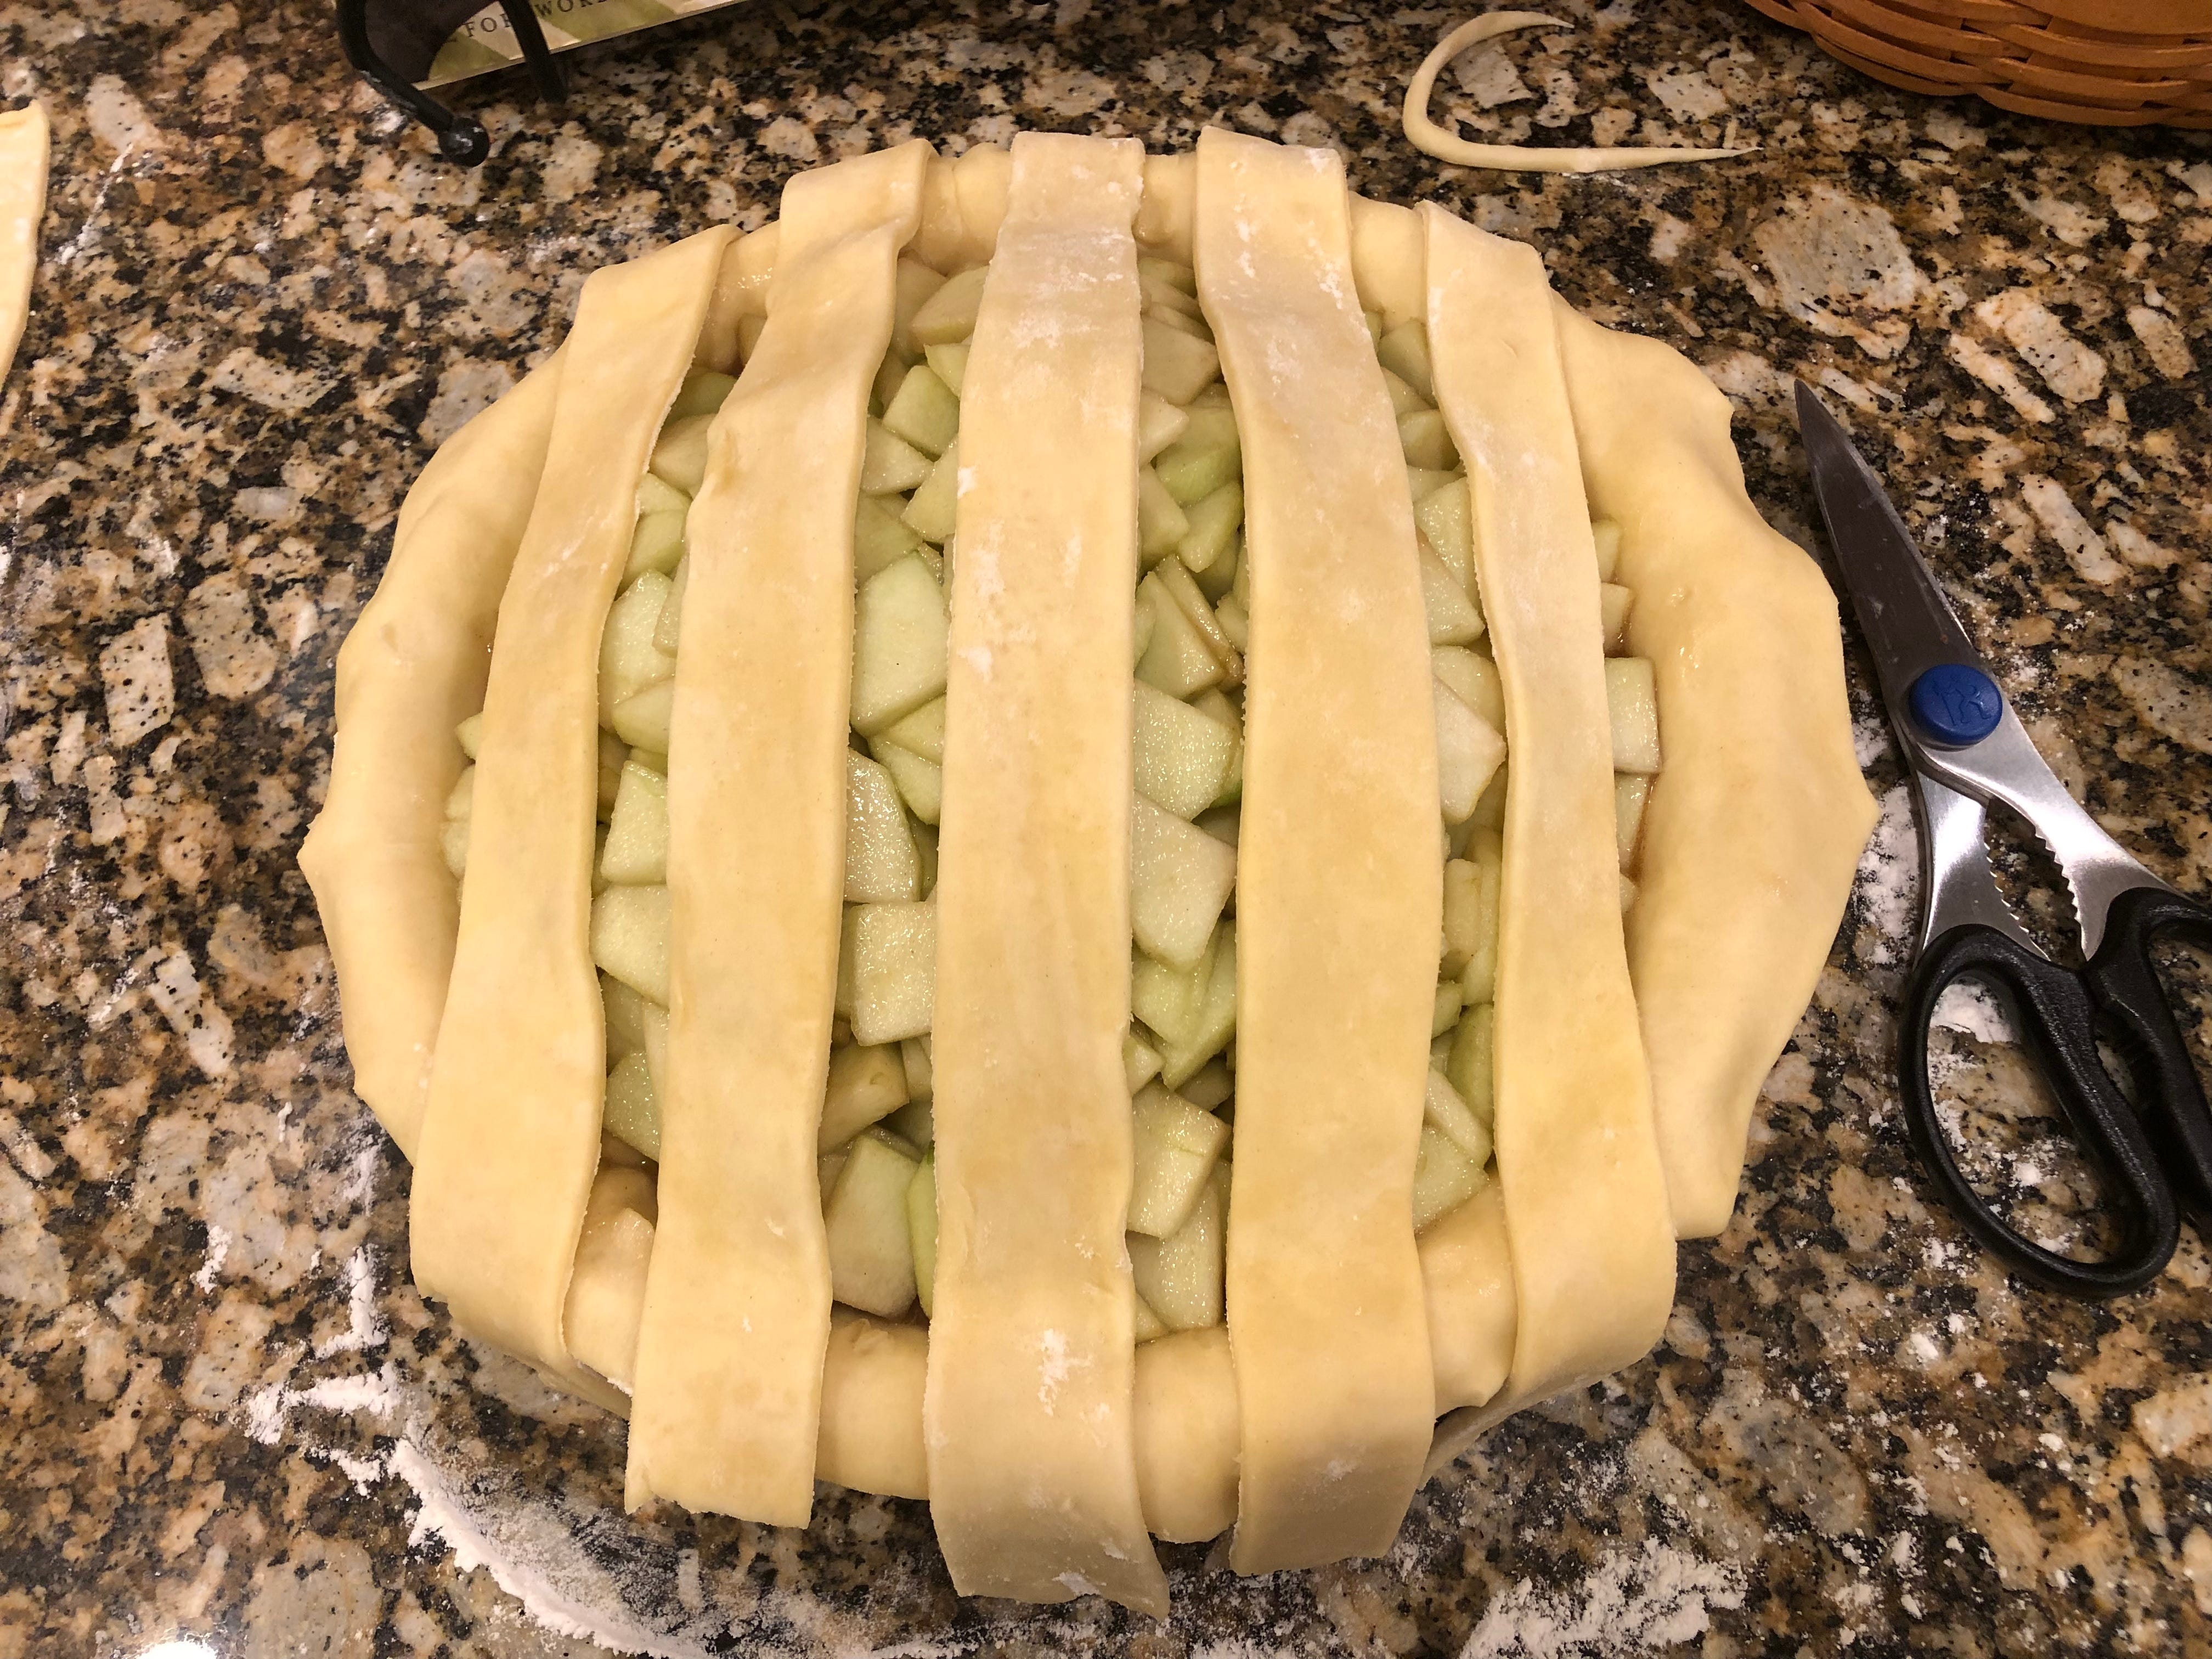
Since we are making a pie and not a potholder made of loops of fabric (remember potholder looms?), we are going to cheat a little bit to get the weft going. Starting with your center strip, pull every other strip back a little more than halfway and place a weft strip across the center.
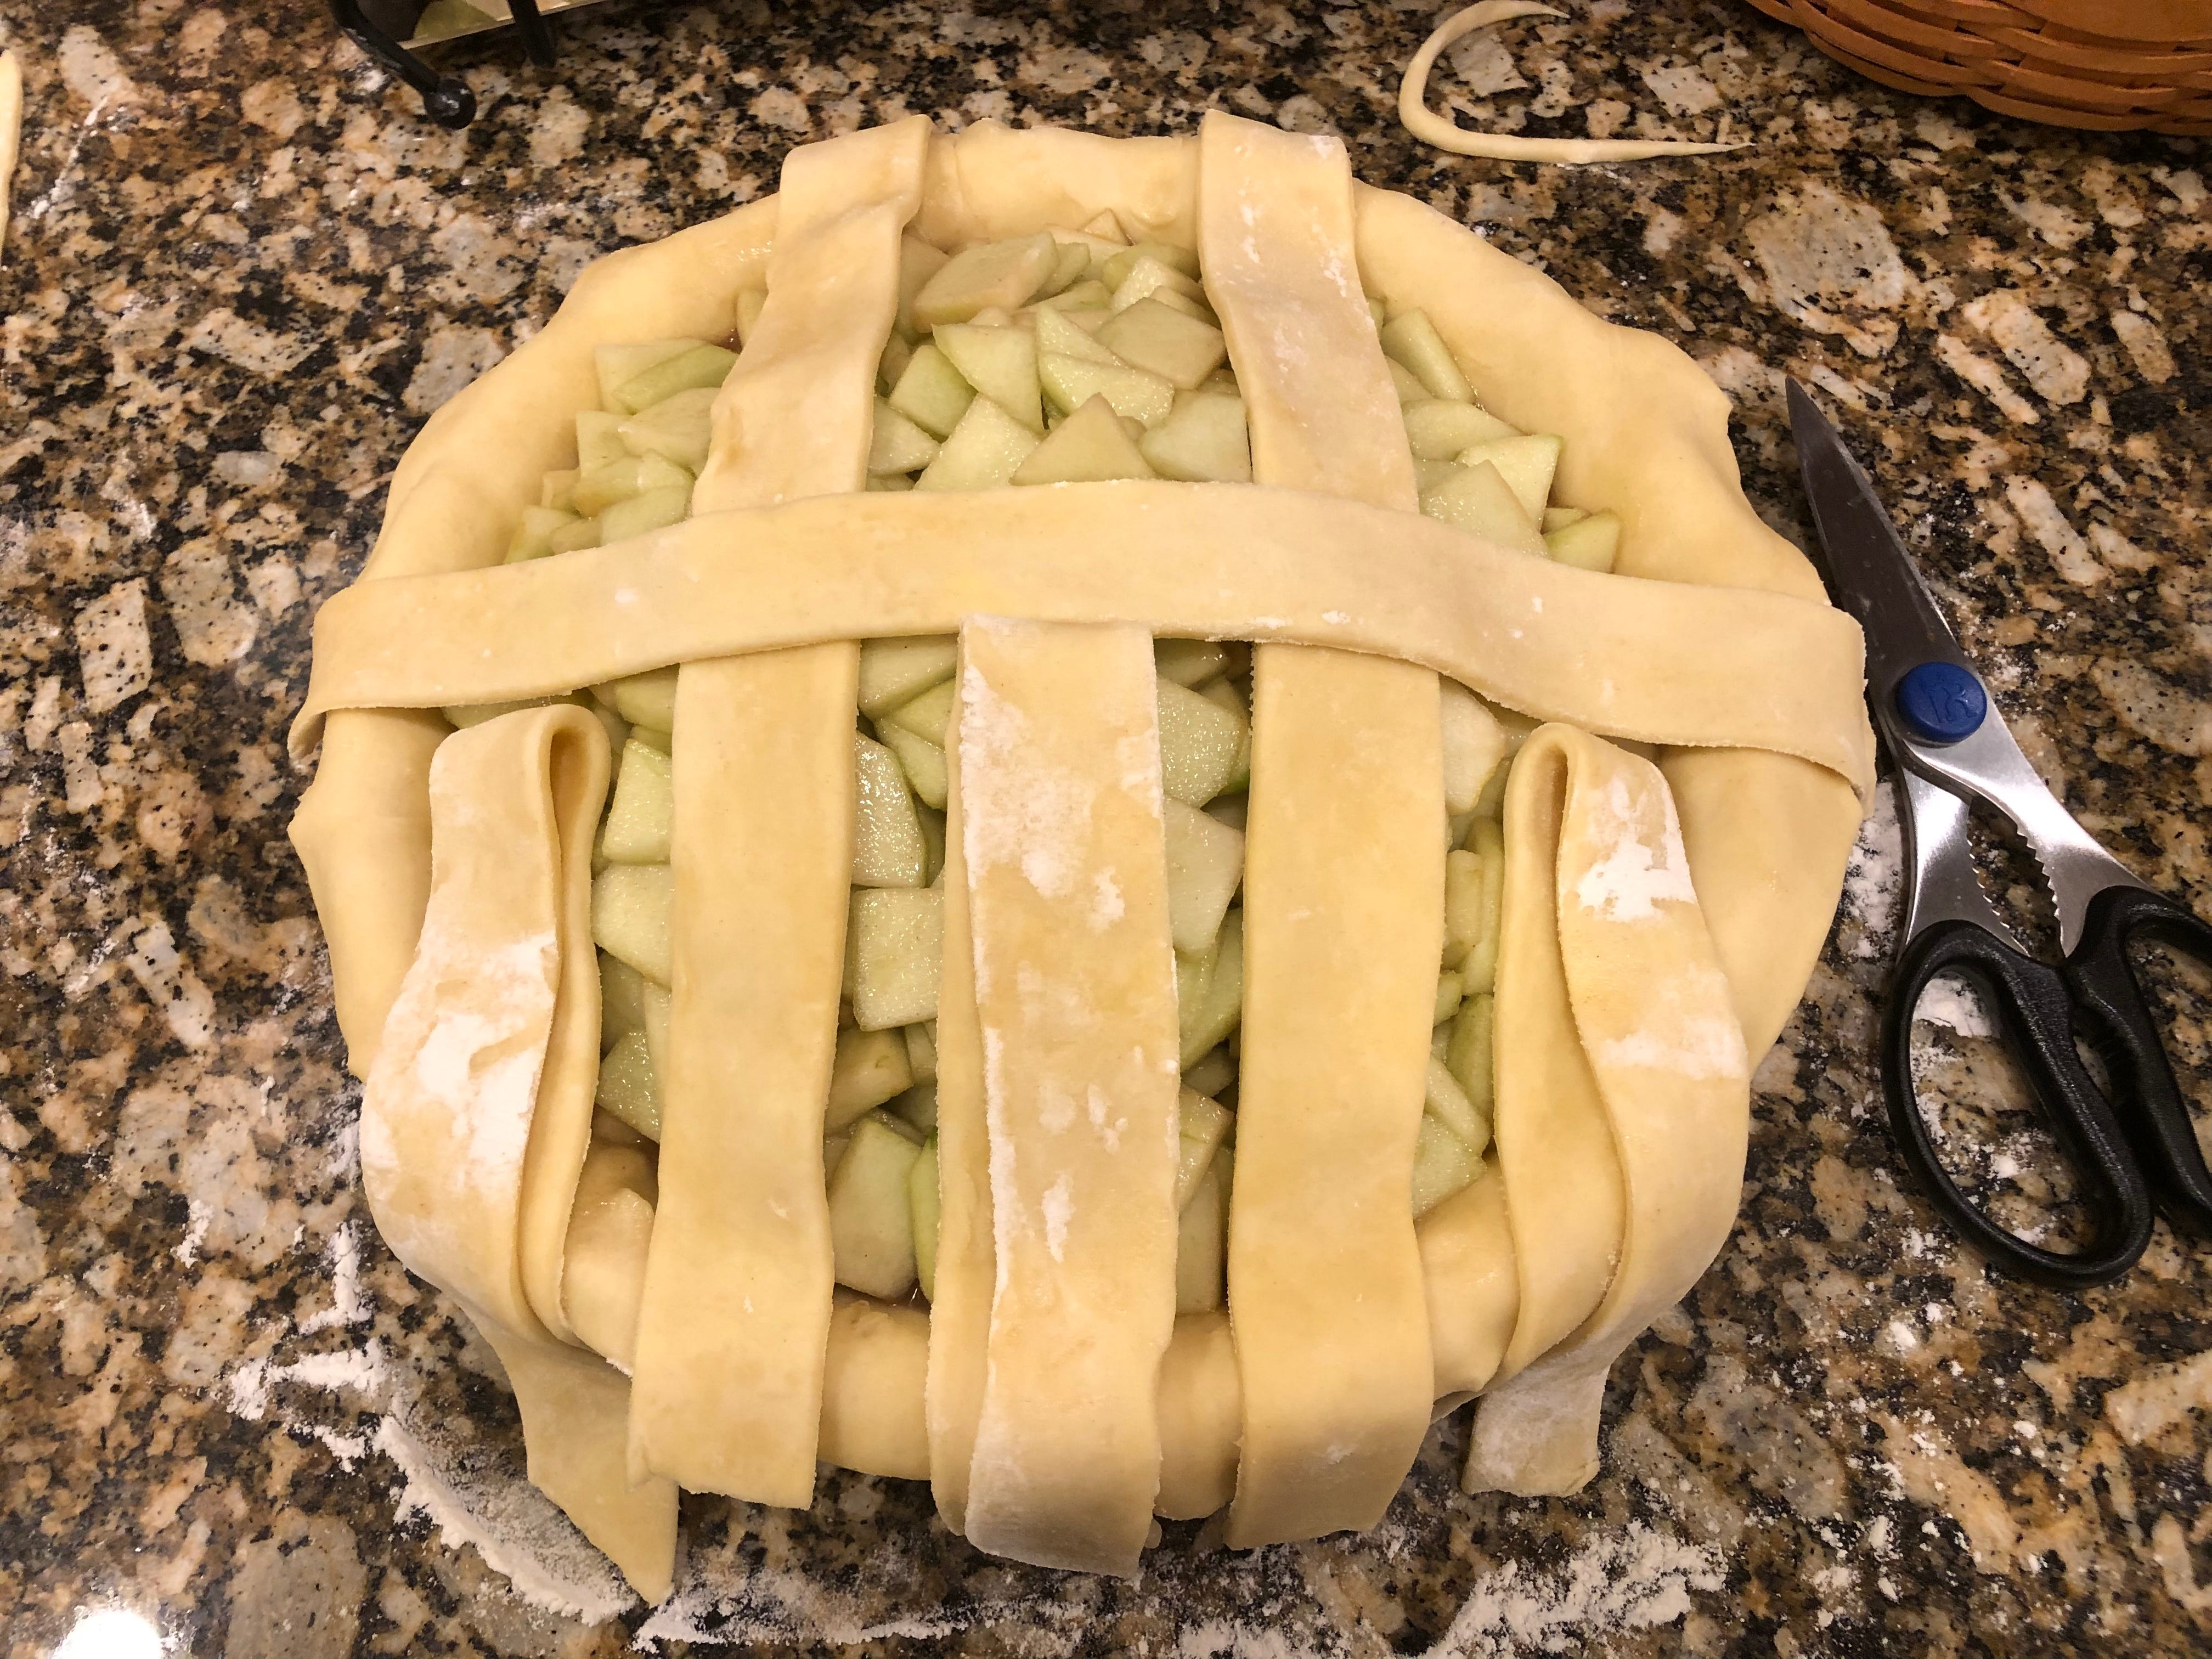
Put your warp strips back in place and pull back the other strips. Lay the next weft strip across the pie, and put the warp strips back in place again.
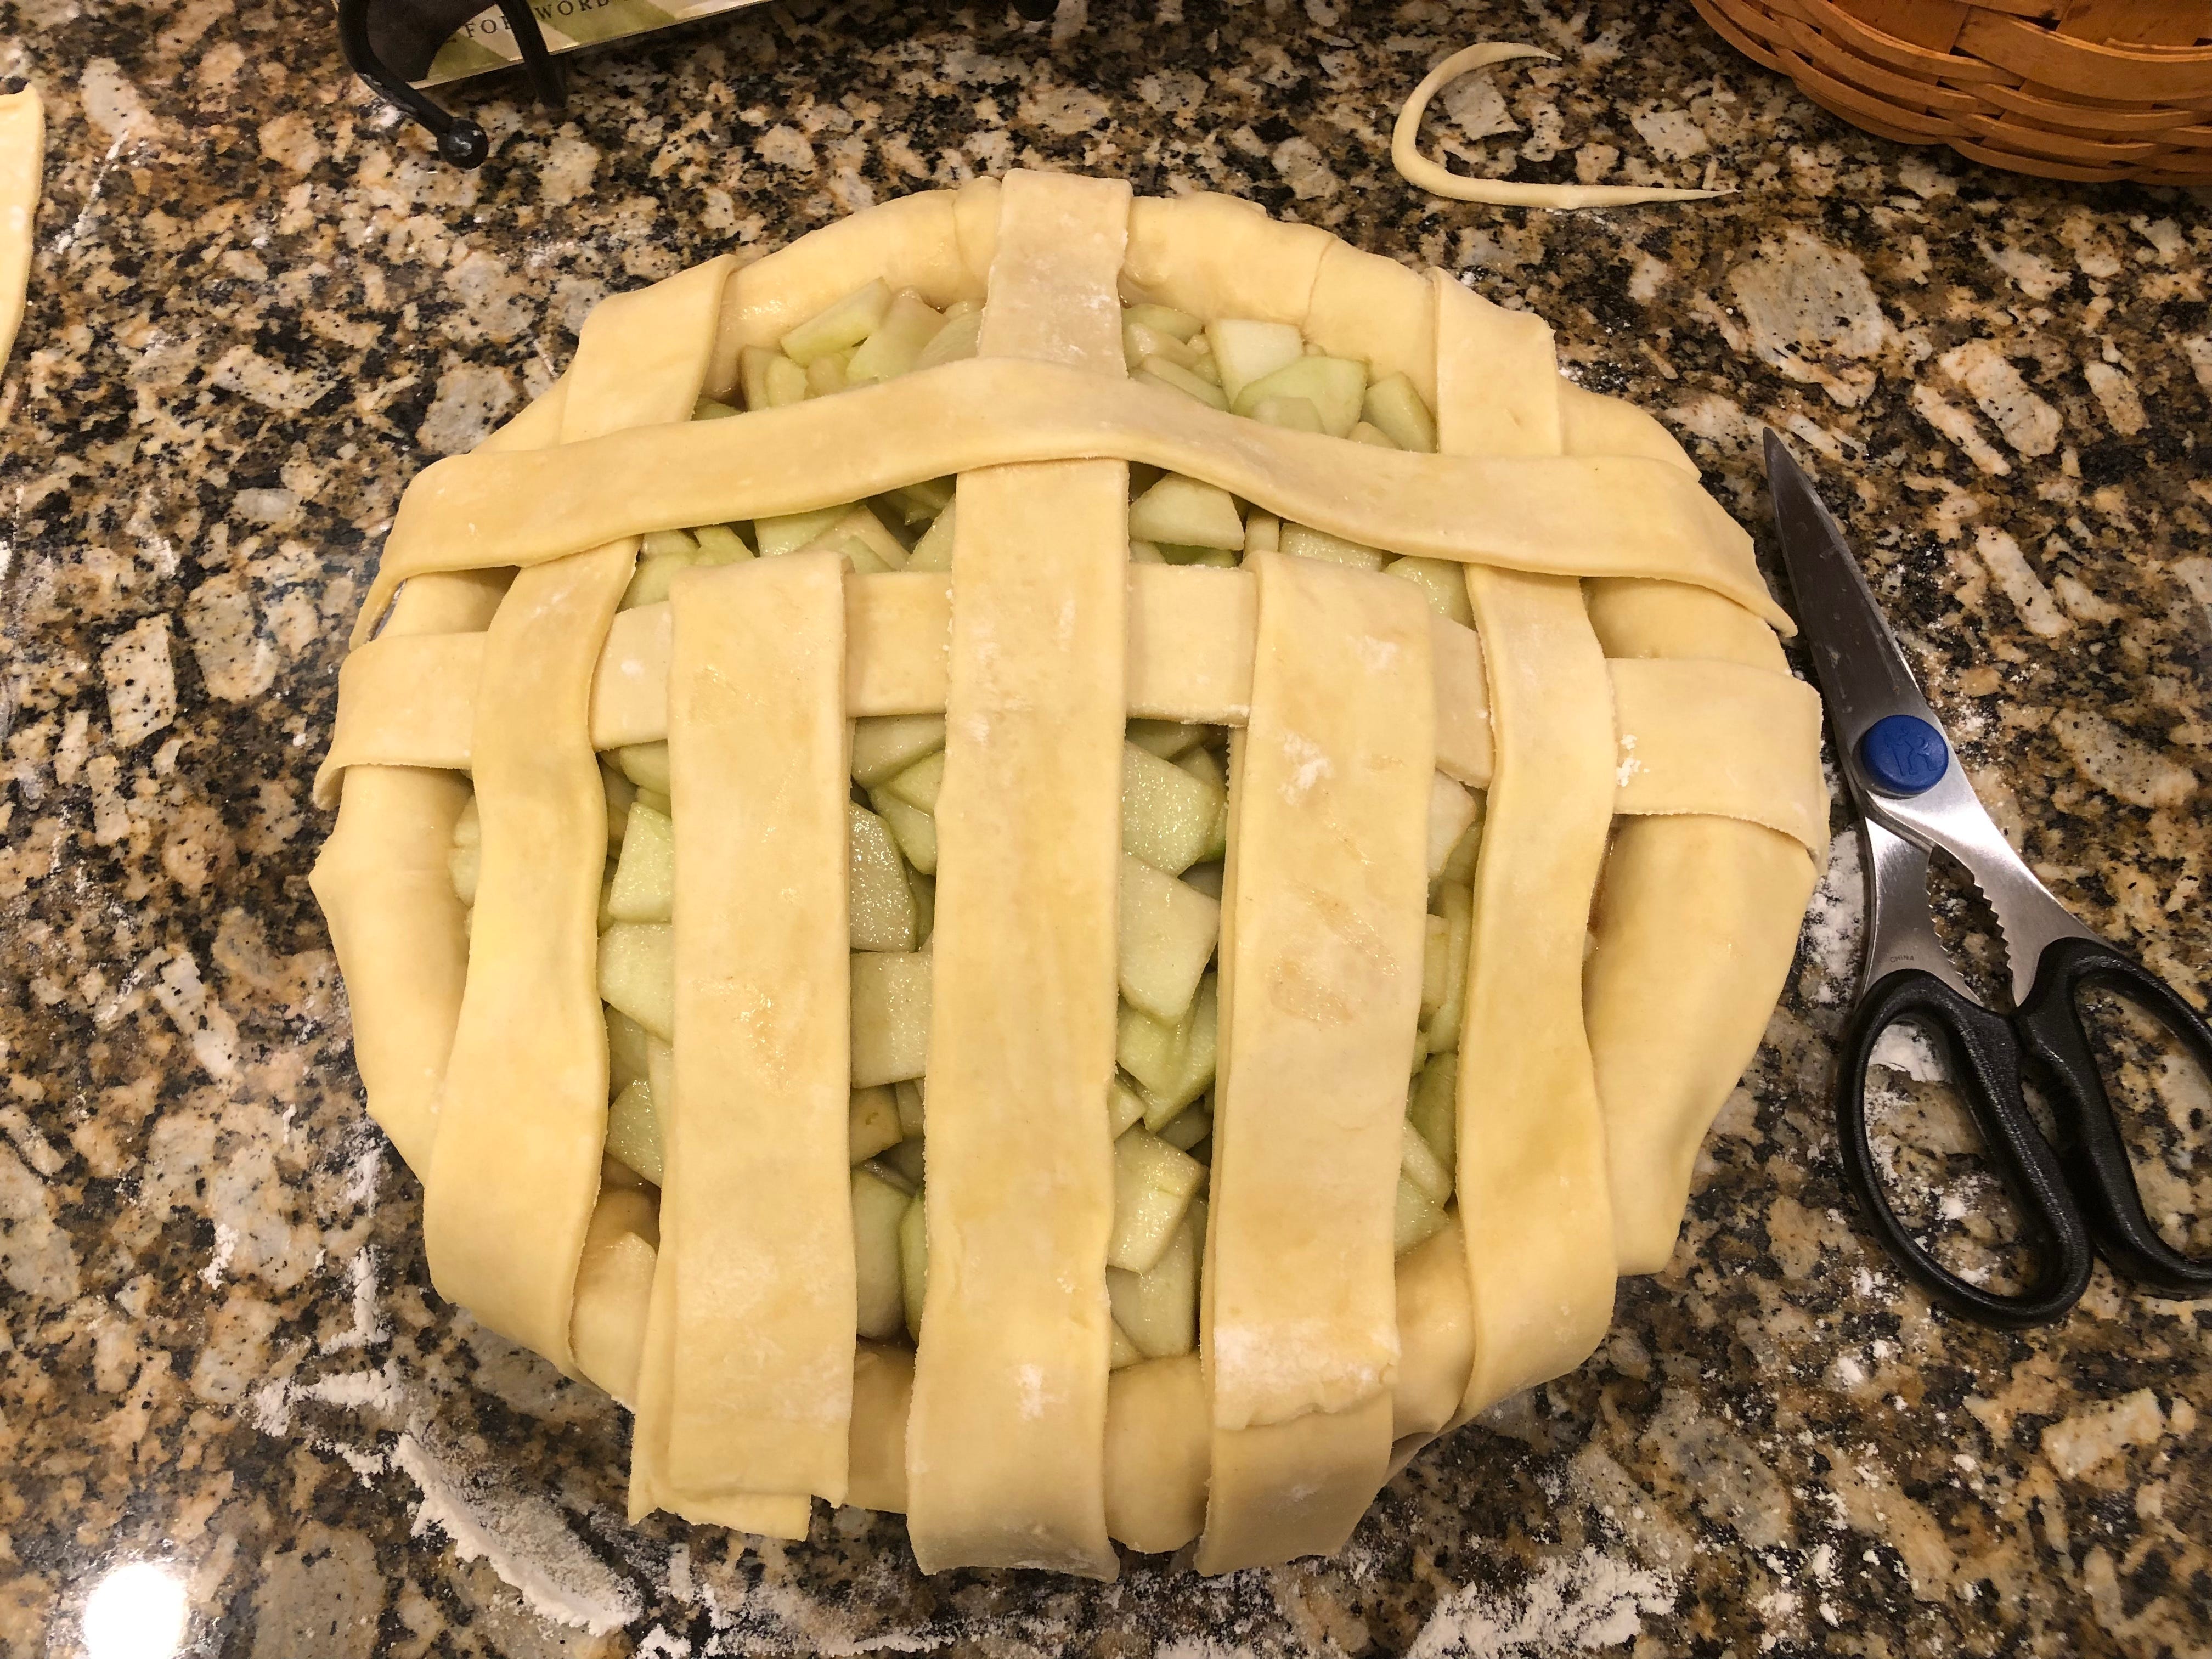
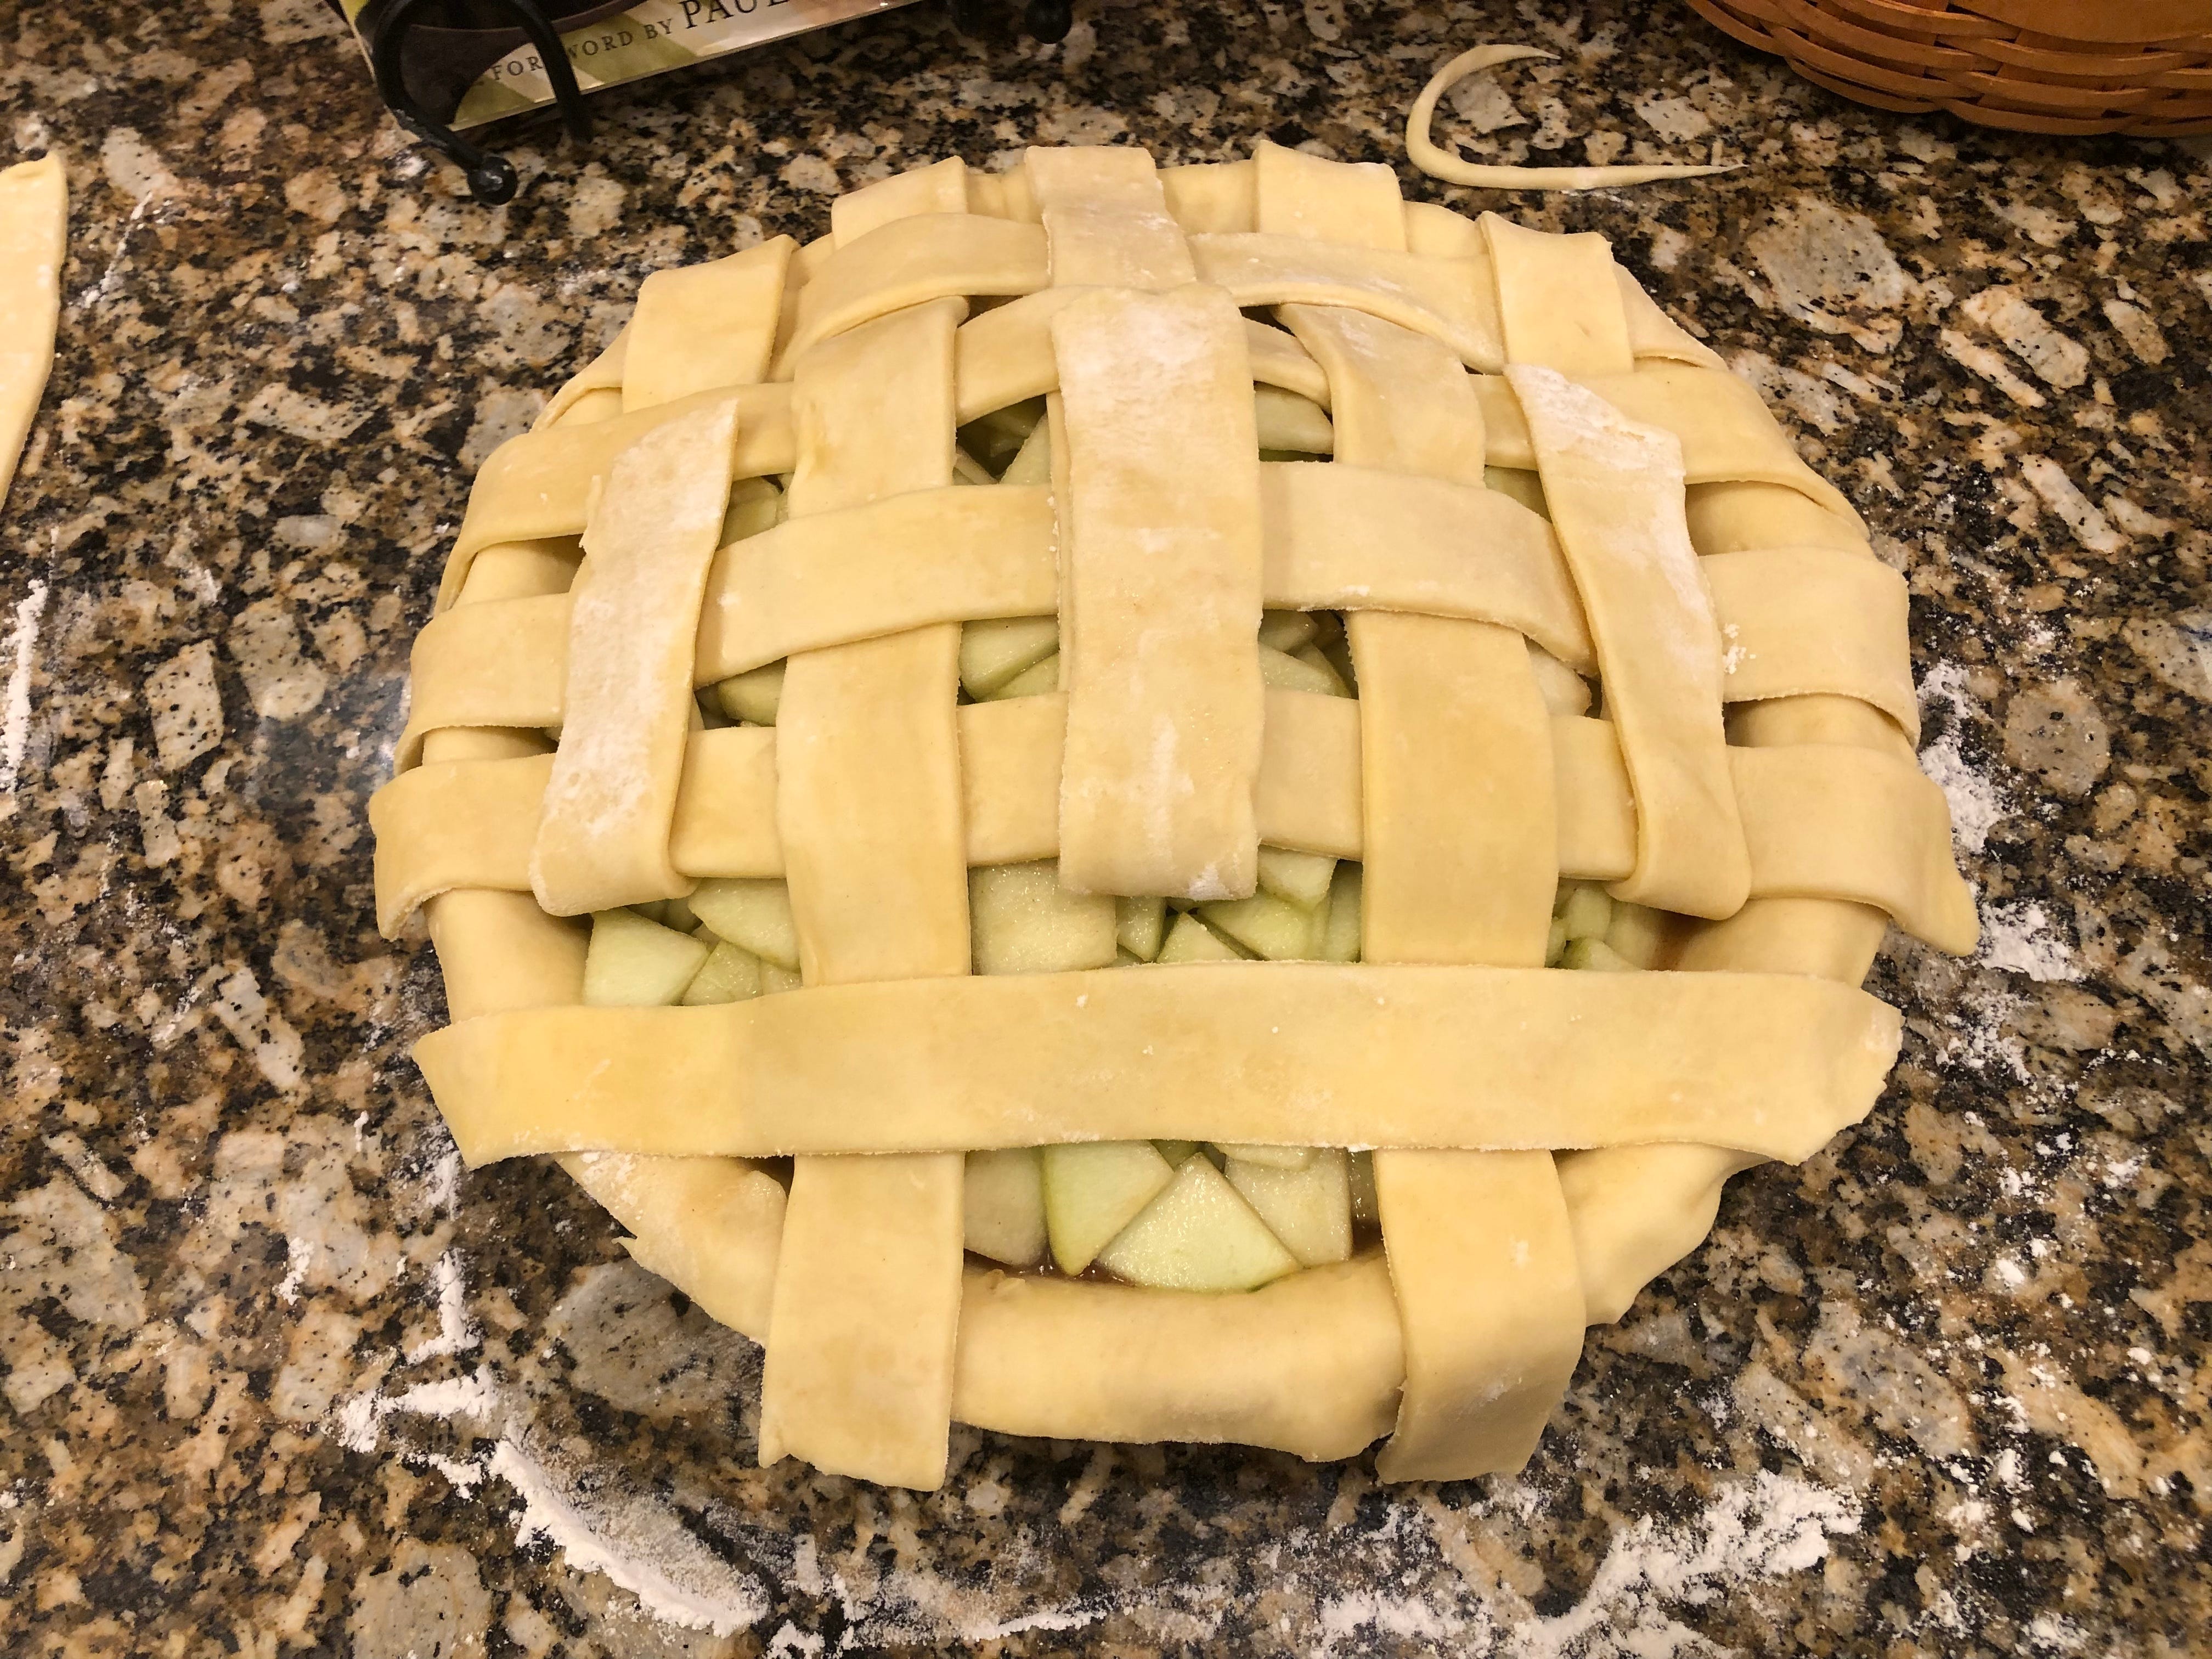
Keep folding back warp strips and placing weft strips until you finish one side, and then do the same thing with the other until you’ve covered the top. Trim the pastry strips even with the edges of the bottom crust, fold both under a bit, and press the edges into whatever design you want to use. I like a more rustic look and just mash the top and bottom edges together to make them seal.
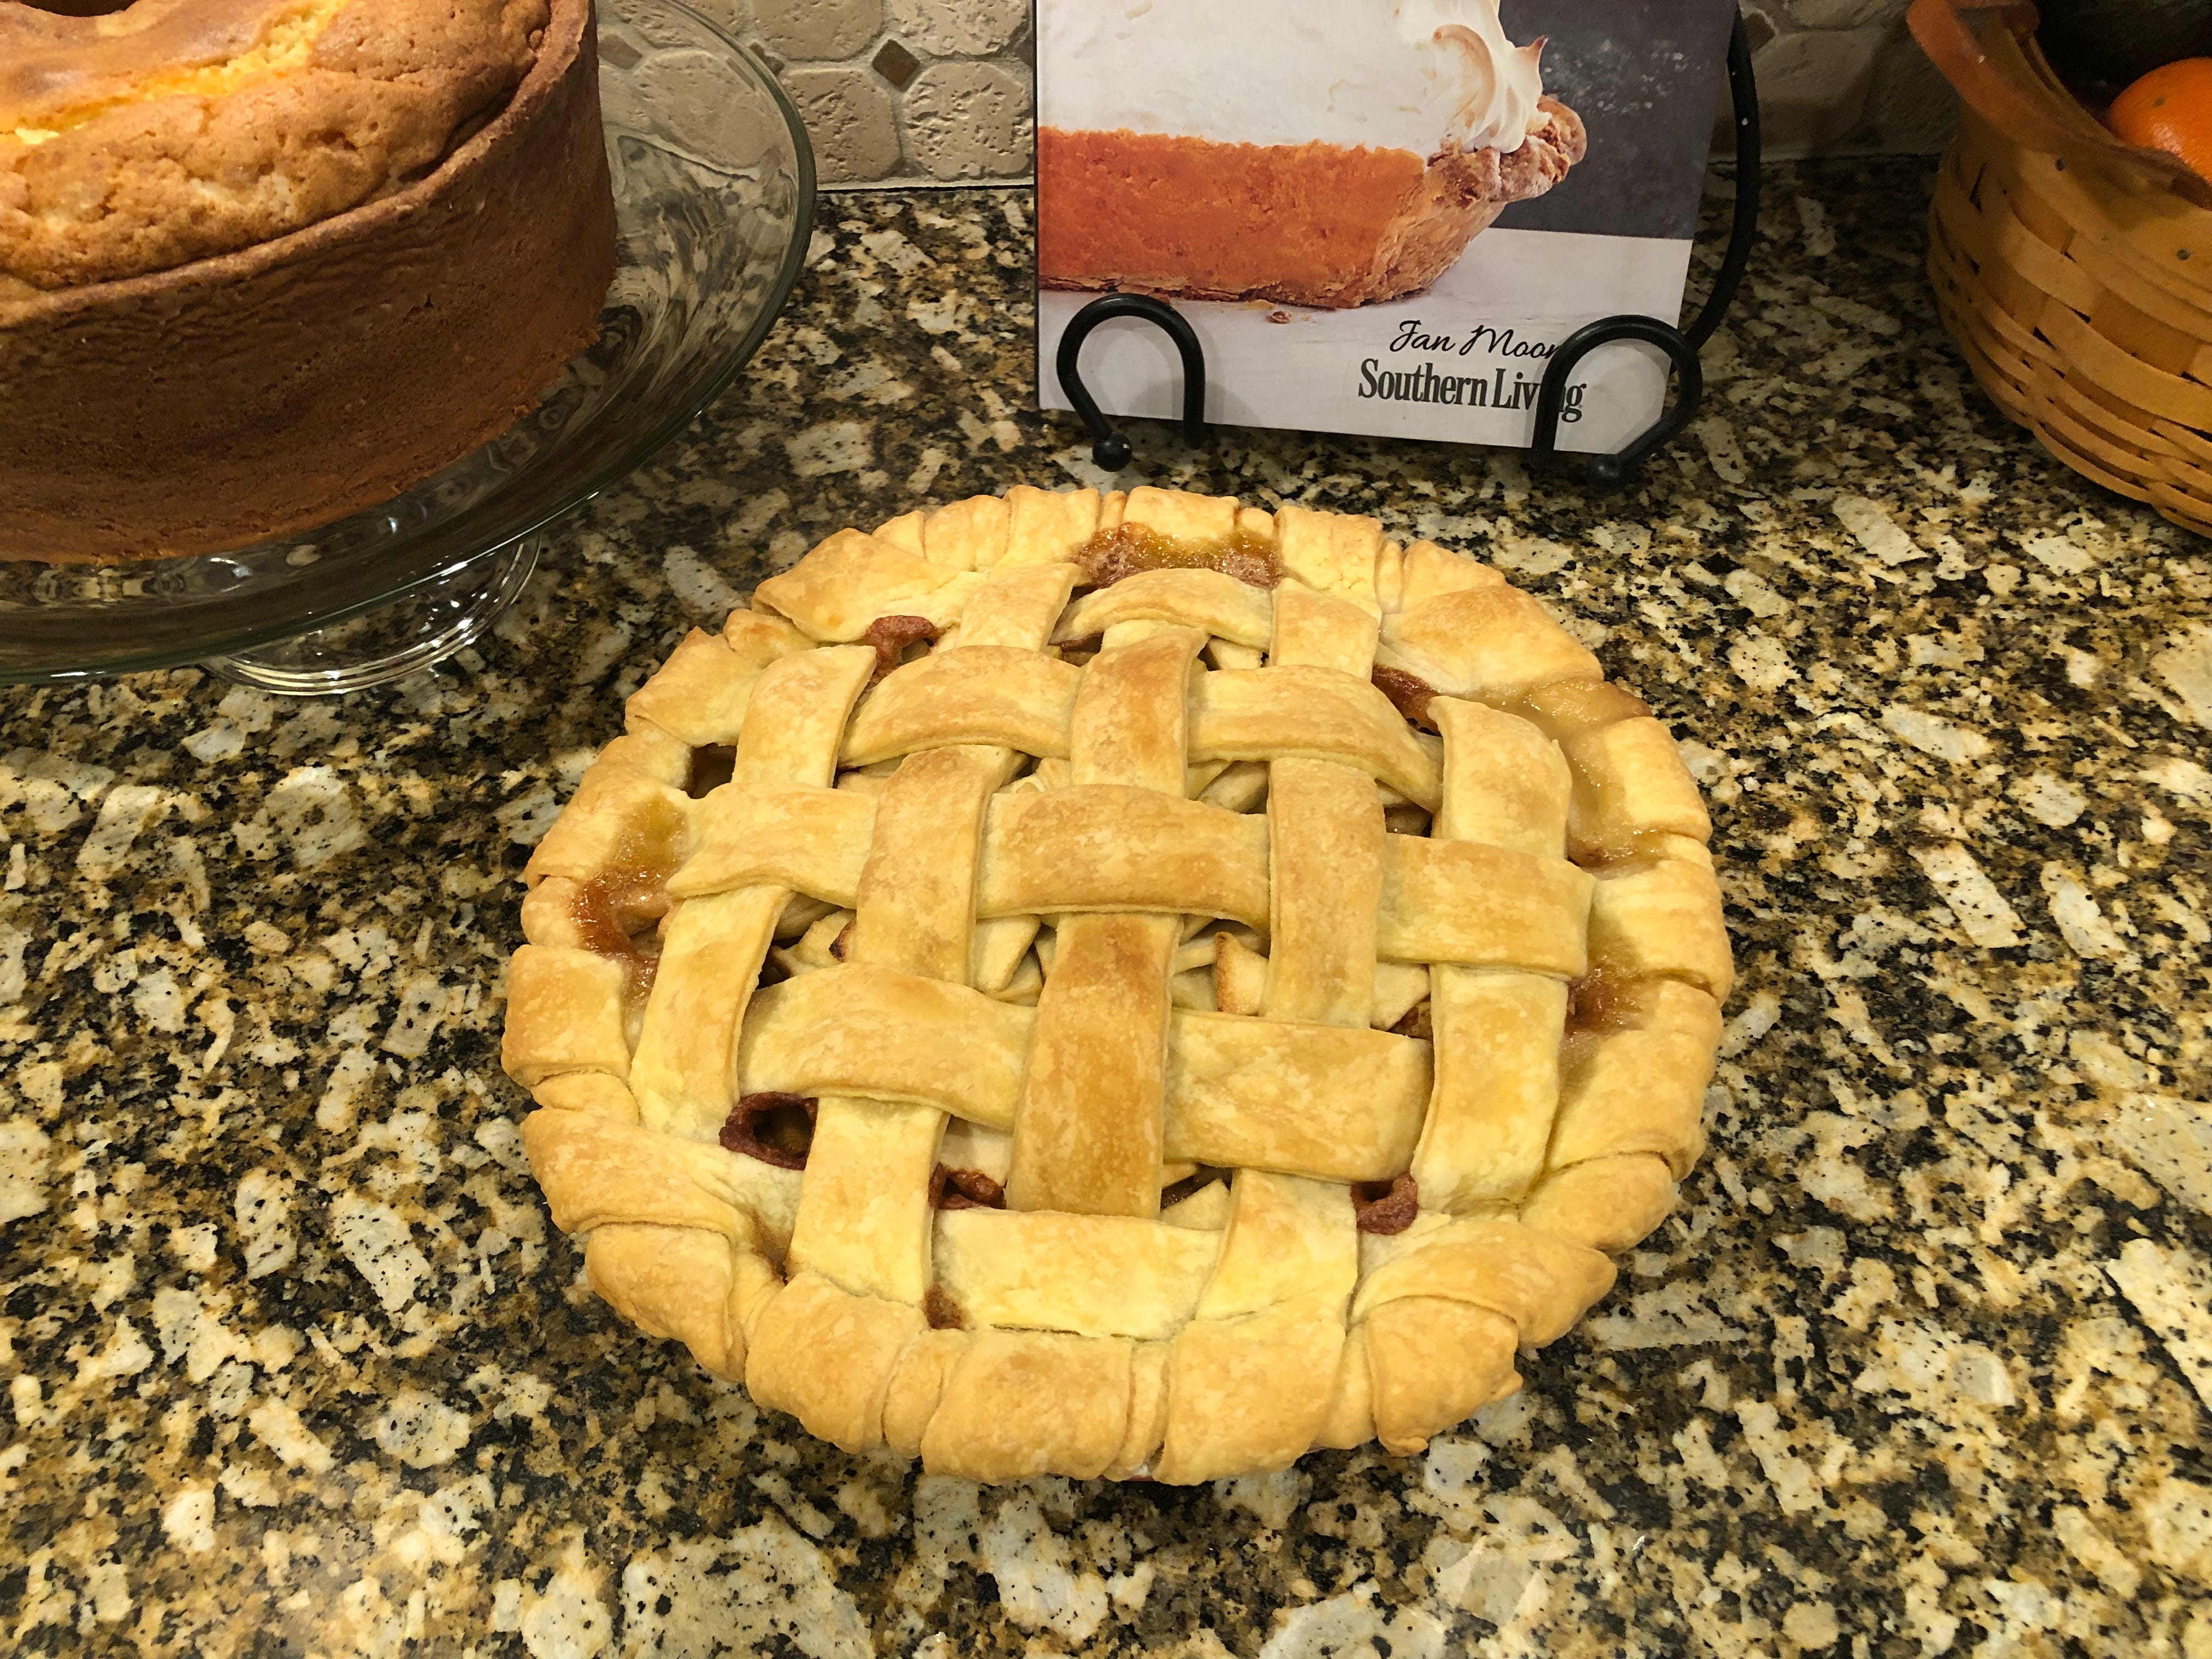
Bake your pie according to the recipe directions and enjoy impressing your friends with your fancy piecrust top. If you don’t want to have a mess in your oven, it’s important to put your pie plate onto a foil lined baking sheet, preferably one with a rim. Fruit pies are notorious for bubbling over, as you can see mine did. When I press the edges of my piecrusts together, I try to leave a lip to catch the juices, but sometimes they escape containment anyway.
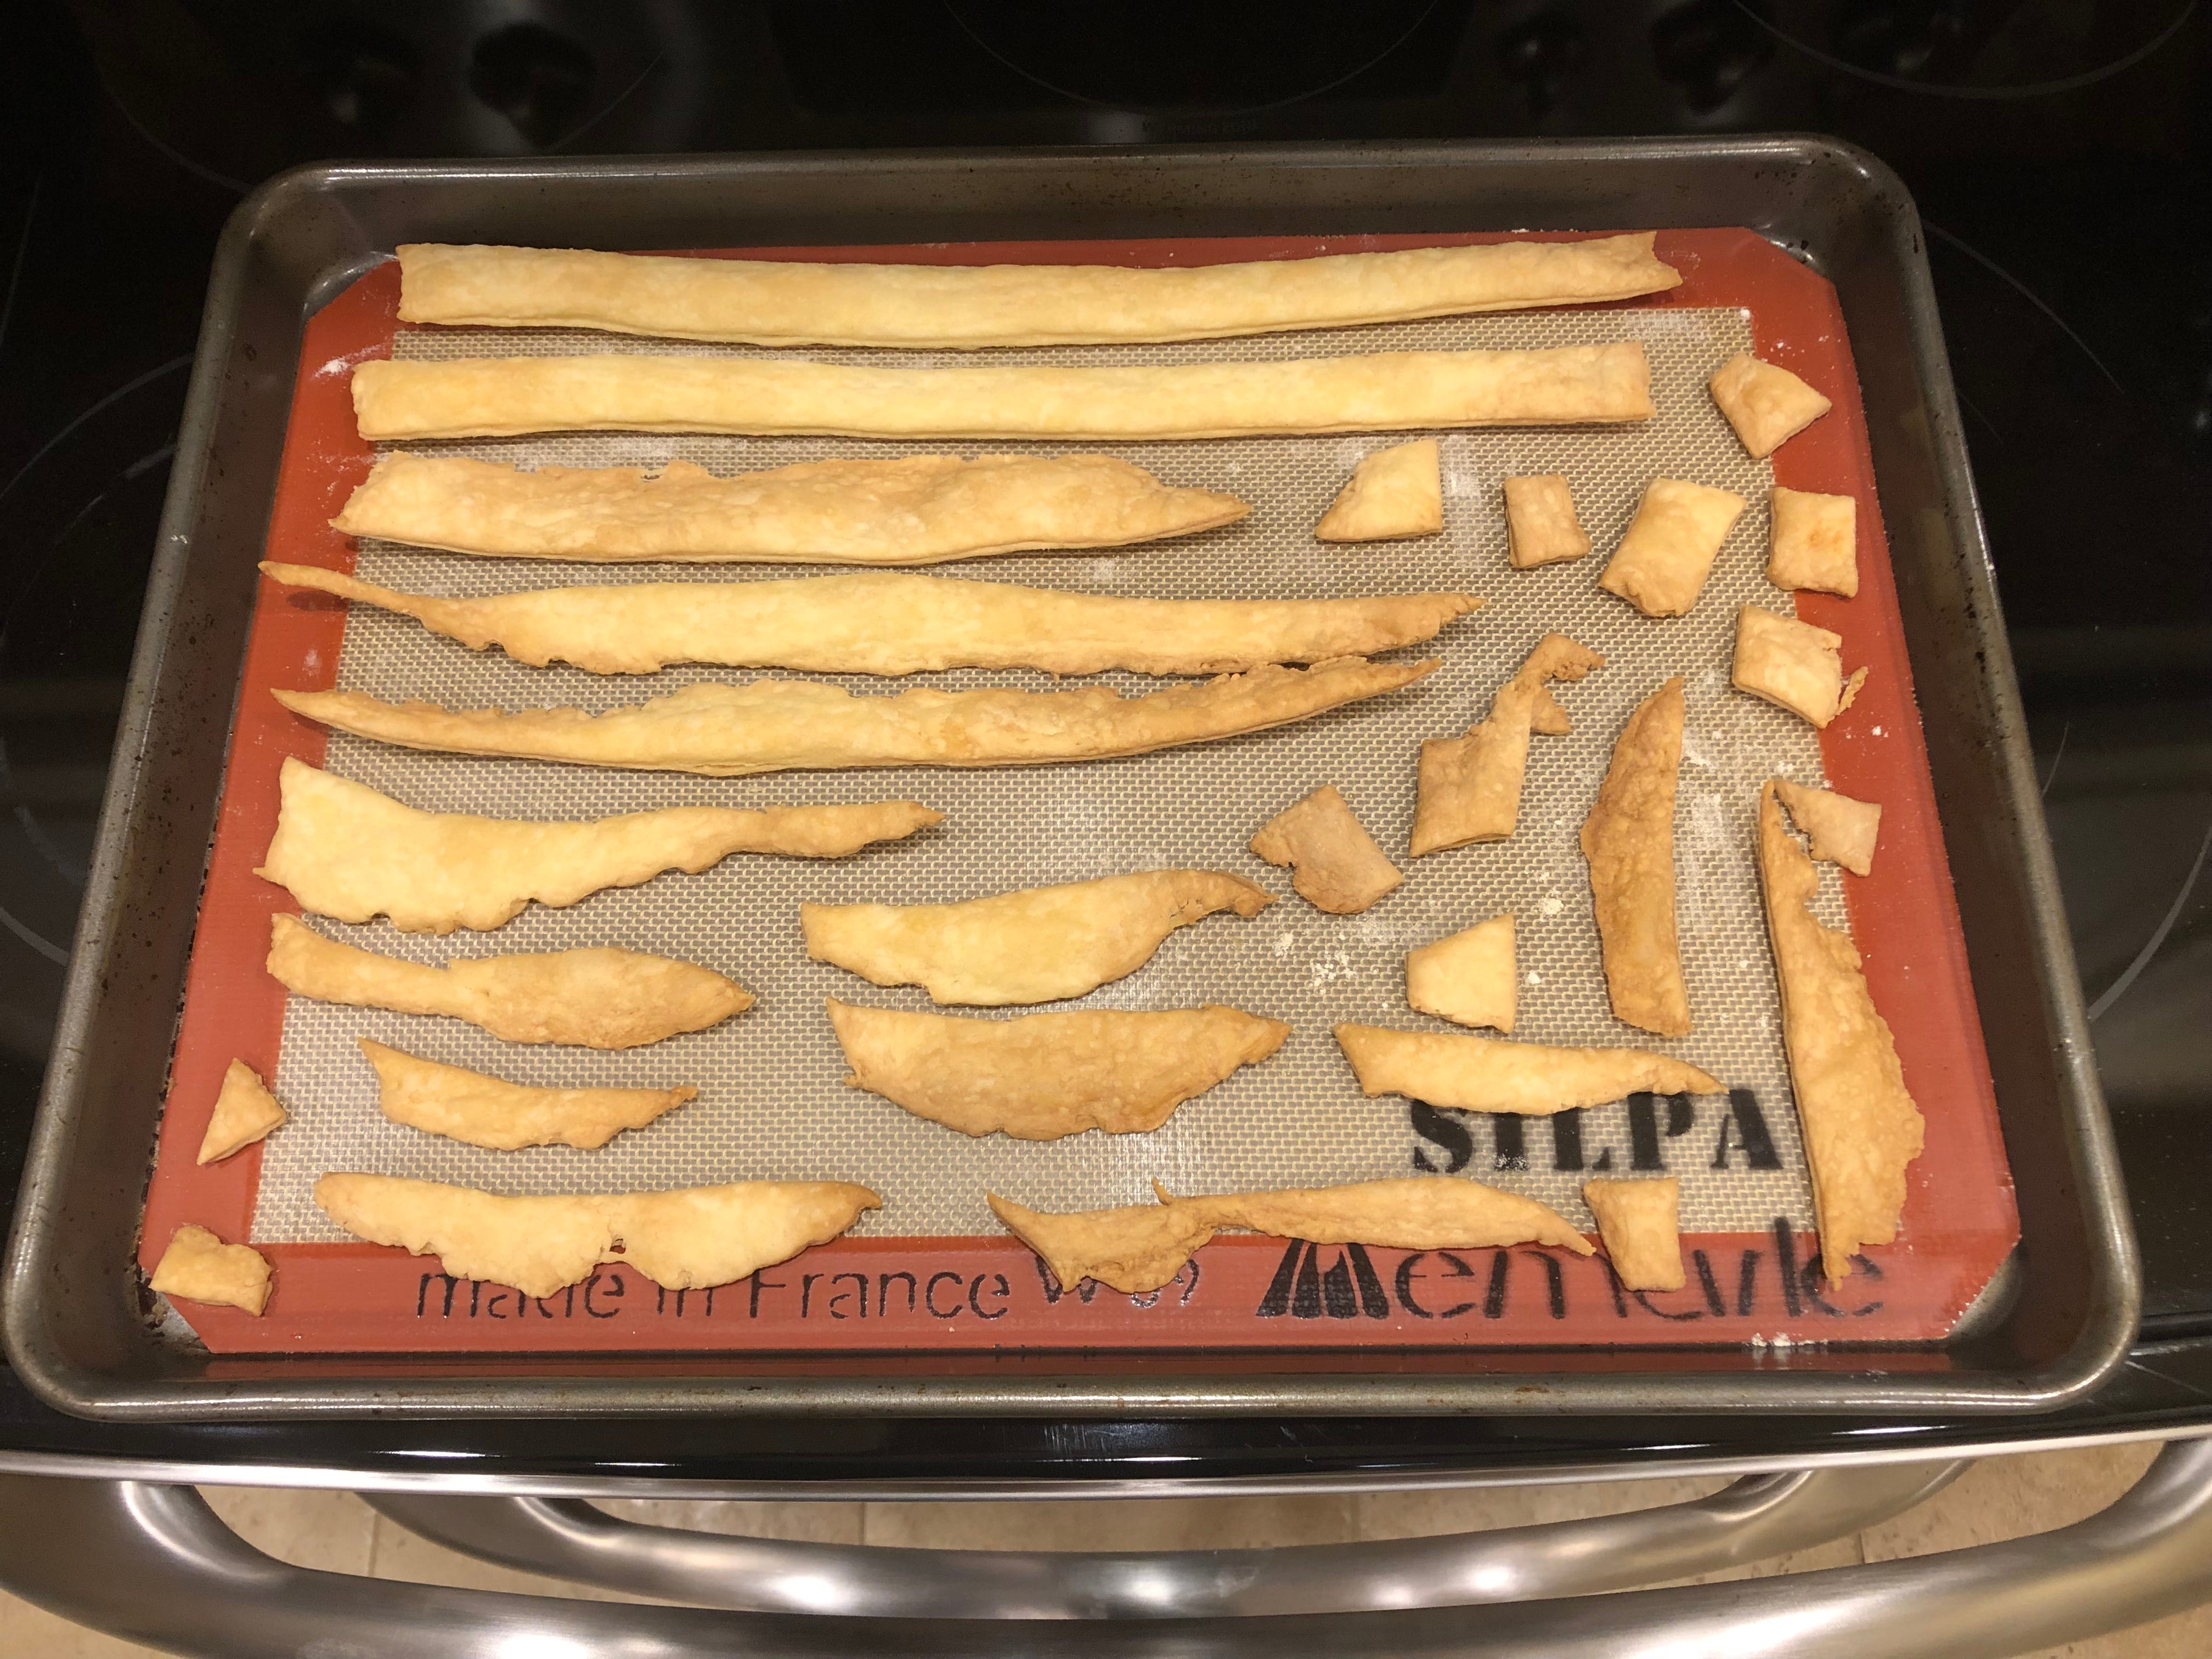
What do you do with all the piecrust scraps left over from when you trimmed things up? You bake them too! This is my favorite part of pie making, and pie scraps are delicious.
You can use a lattice top for any double crust pie you want to, but it’s especially nice for fruit pies since they tend to be juicy and need plenty of ventilation in the top crust.
A lattice piecrust is super easy, and I hope you will give it a try.
As promised, here is my apple pie recipe. It’s based on this one, but I’ve made a few modifications to the original recipe.
Apple Pie
9 inch double piecrust
1/2 cup butter
3 tablespoons all-purpose flour
1/4 cup water
1/2 cup white sugar
1/2 cup packed brown sugar
8 Granny Smith apples, peeled, cored, sliced, and chopped into large pieces
Cinnamon to taste (optional)
Preheat oven to 425 degrees. Melt the butter in a saucepan and stir in flour. Cook for about a minute. Add water, white sugar, and brown sugar. Bring to a boil and turn down the heat a bit to let it simmer for a few minutes.
In a large bowl, toss the apples in the butter/sugar mixture until well covered. Sprinkle with cinnamon to taste and toss again.
Place one piecrust in the bottom of a 9-inch pie plate. Spoon apples into the crust and decide how much juice you want to include with them. If you include it all, your pie will be very juicy, so you may want to experiment. It will also depend on your apples. Sometimes they give up a lot of juice when mixed with the butter/sugar mixture, and sometimes they don’t.
Cover the apples with a lattice work crust, or if you prefer to use a top crust, make sure it is vented well.
Bake at 425 degrees for 15 minutes, and then without opening the oven door, reduce the temperature to 350 degrees and continue baking for 35-45 minutes until the apples are soft.
I hope you’ll give a lattice work piecrust a try. I’m all in for things that look fancy with little effort, and this one definitely fits the bill. The Jacobs family is heading to our happy place this weekend, aka Lake Rabun, and we hope you have a nice fall weekend as well.
Until next time,
Karla